

Na última foto do Guguinha em homenagem ao Cazuza, eu resolvi dar uma melhorada nos equipamentos produzindo um microfone e pedestal.
Quer fazer o seu show ficar mais realista? Segue o tutorial de Microfone e Pedestal!
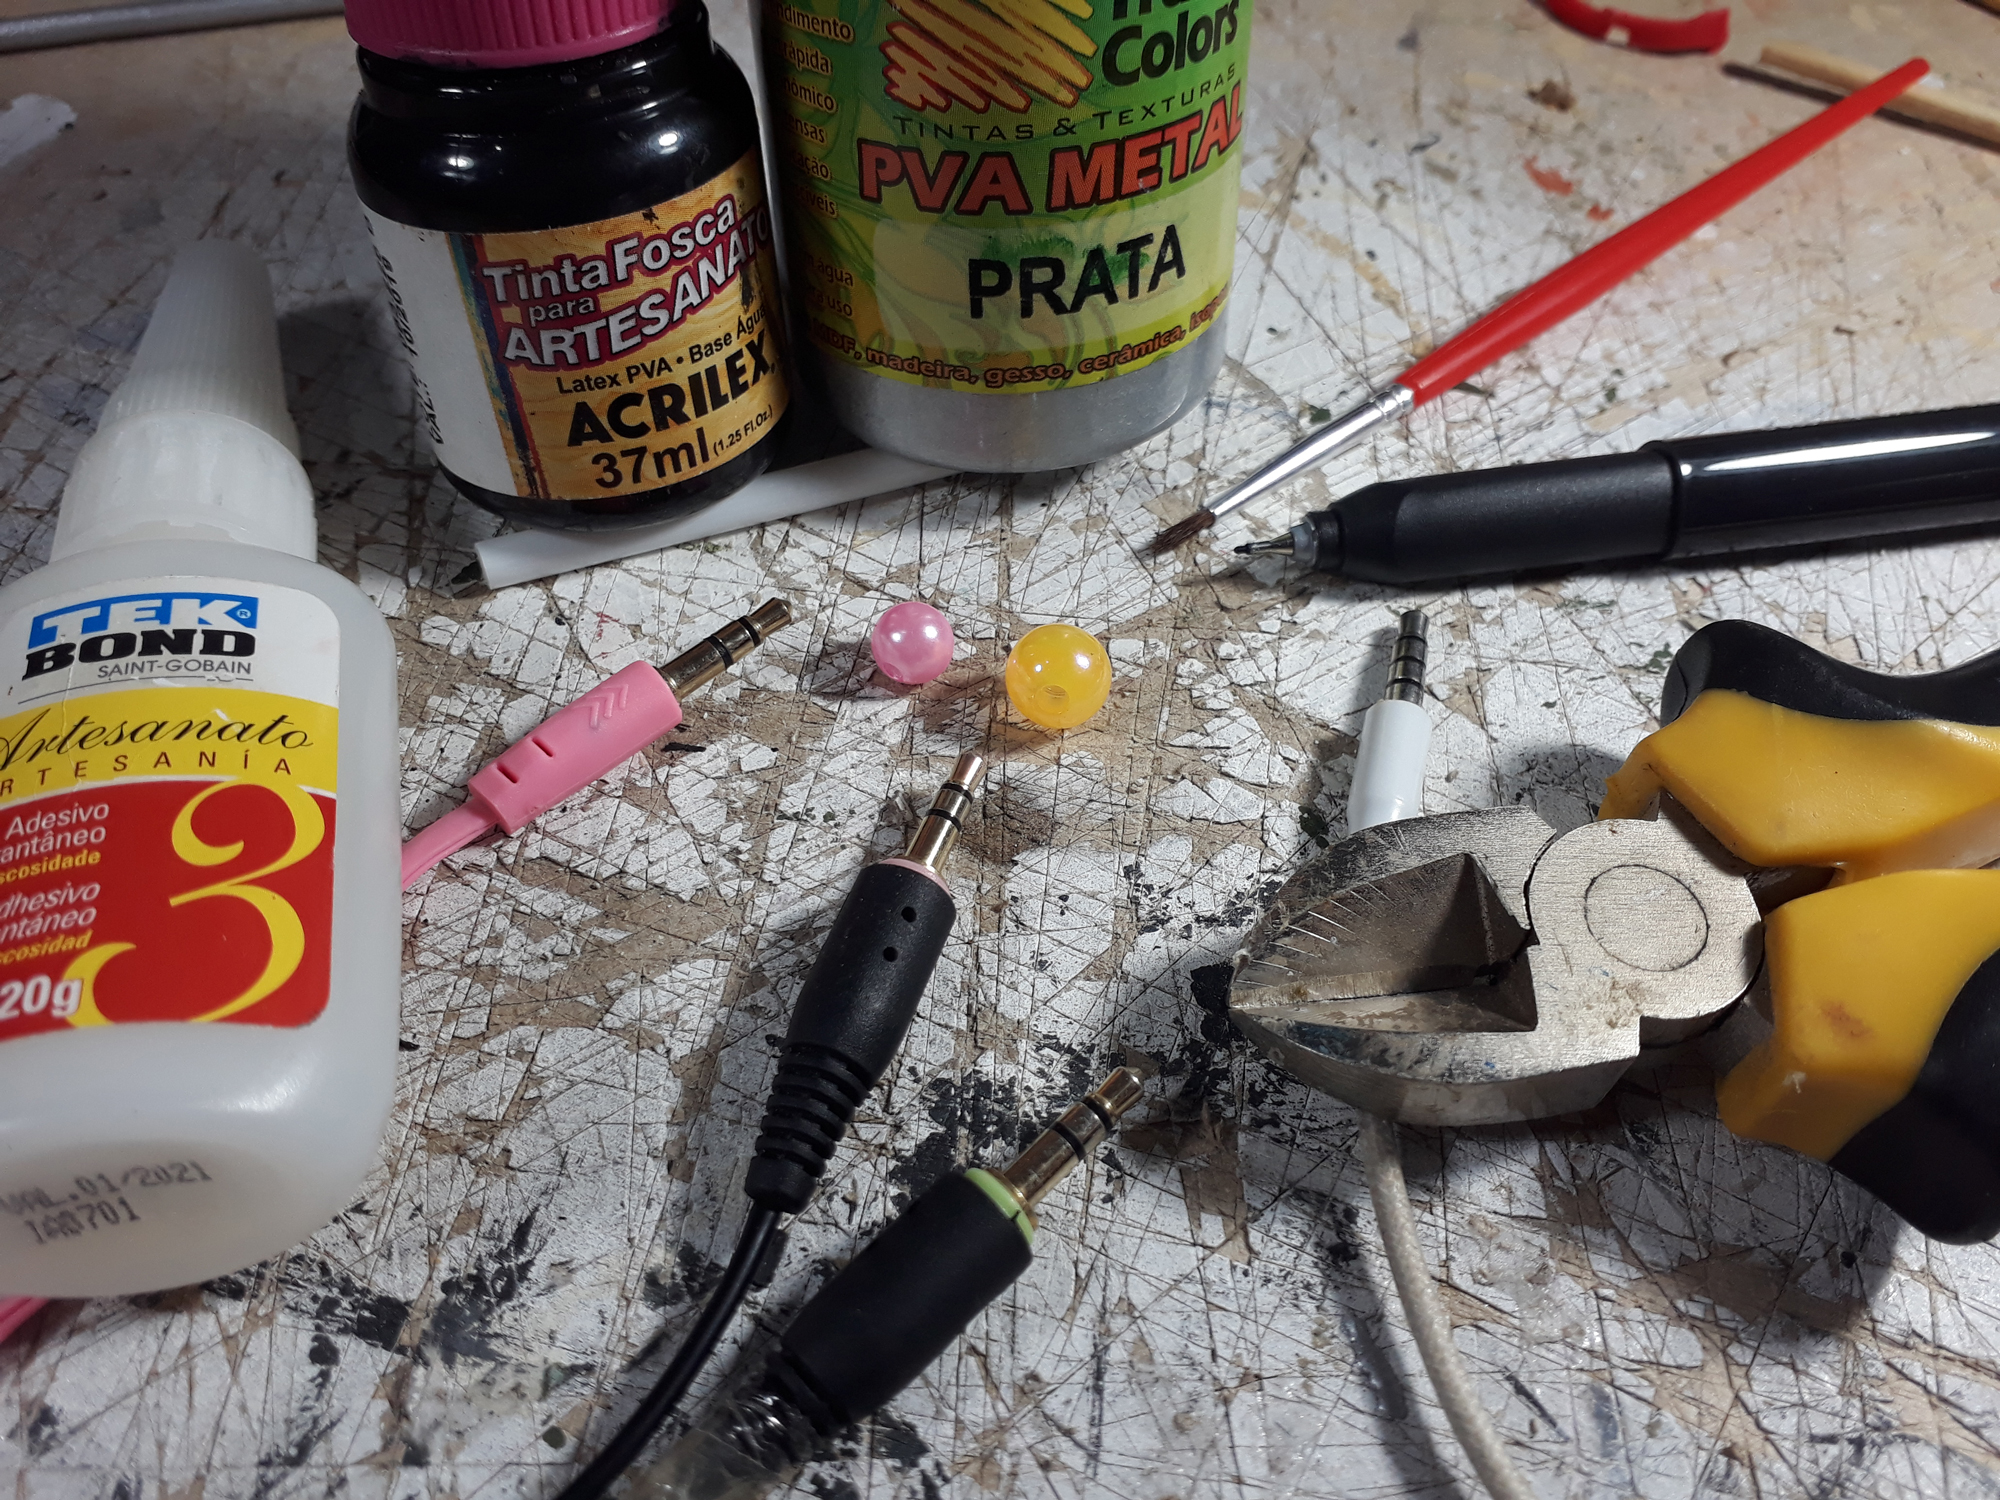
Para o Microfone você vai precisar de:
- Contas de bijuteria (prateada de preferencia)
- Plug de fone de ouvido
- Primer para artesanato
- Tinta para artesanato Preta e Prata
- Caneta marcador de ponta fina
- Fero de solda ou ponteira de ferro aquecida
- Alicate de corte
- Super cola
- Vamos começar cortando a ponta do plug de fone de ouvido, deixando um pequeno cotoco.
- Vamos lixar as rebarbas prara alinhar.
- Pegue um Conta de bijuteria de plástico e vamos alargar o furo com ferro de solda ou uma ponteira aquecida no fogo para encaixar no cotoco do plug.
- Depois de coloar a conta com super cola no cotoco do plug chegou a hora de pintar a Conta. Se você ja tiver uma de cor prateada nem precisa. Primeiro fazemos uma base de primer para a tinta fixar. Depois uma base em preto para uniformizar a cor e por último a tinta prata.
- O Microfone está praticamente pronto. Para fazer os detalhes dos “furinhos” usamos a caneta marcador de ponta fina para pontilhar a cabeça do microfone.
Pronto! Seu microfone está finalizado! Lembre que existem muitos tipos diferentes de Microfones por aí então, seja criativo!
01 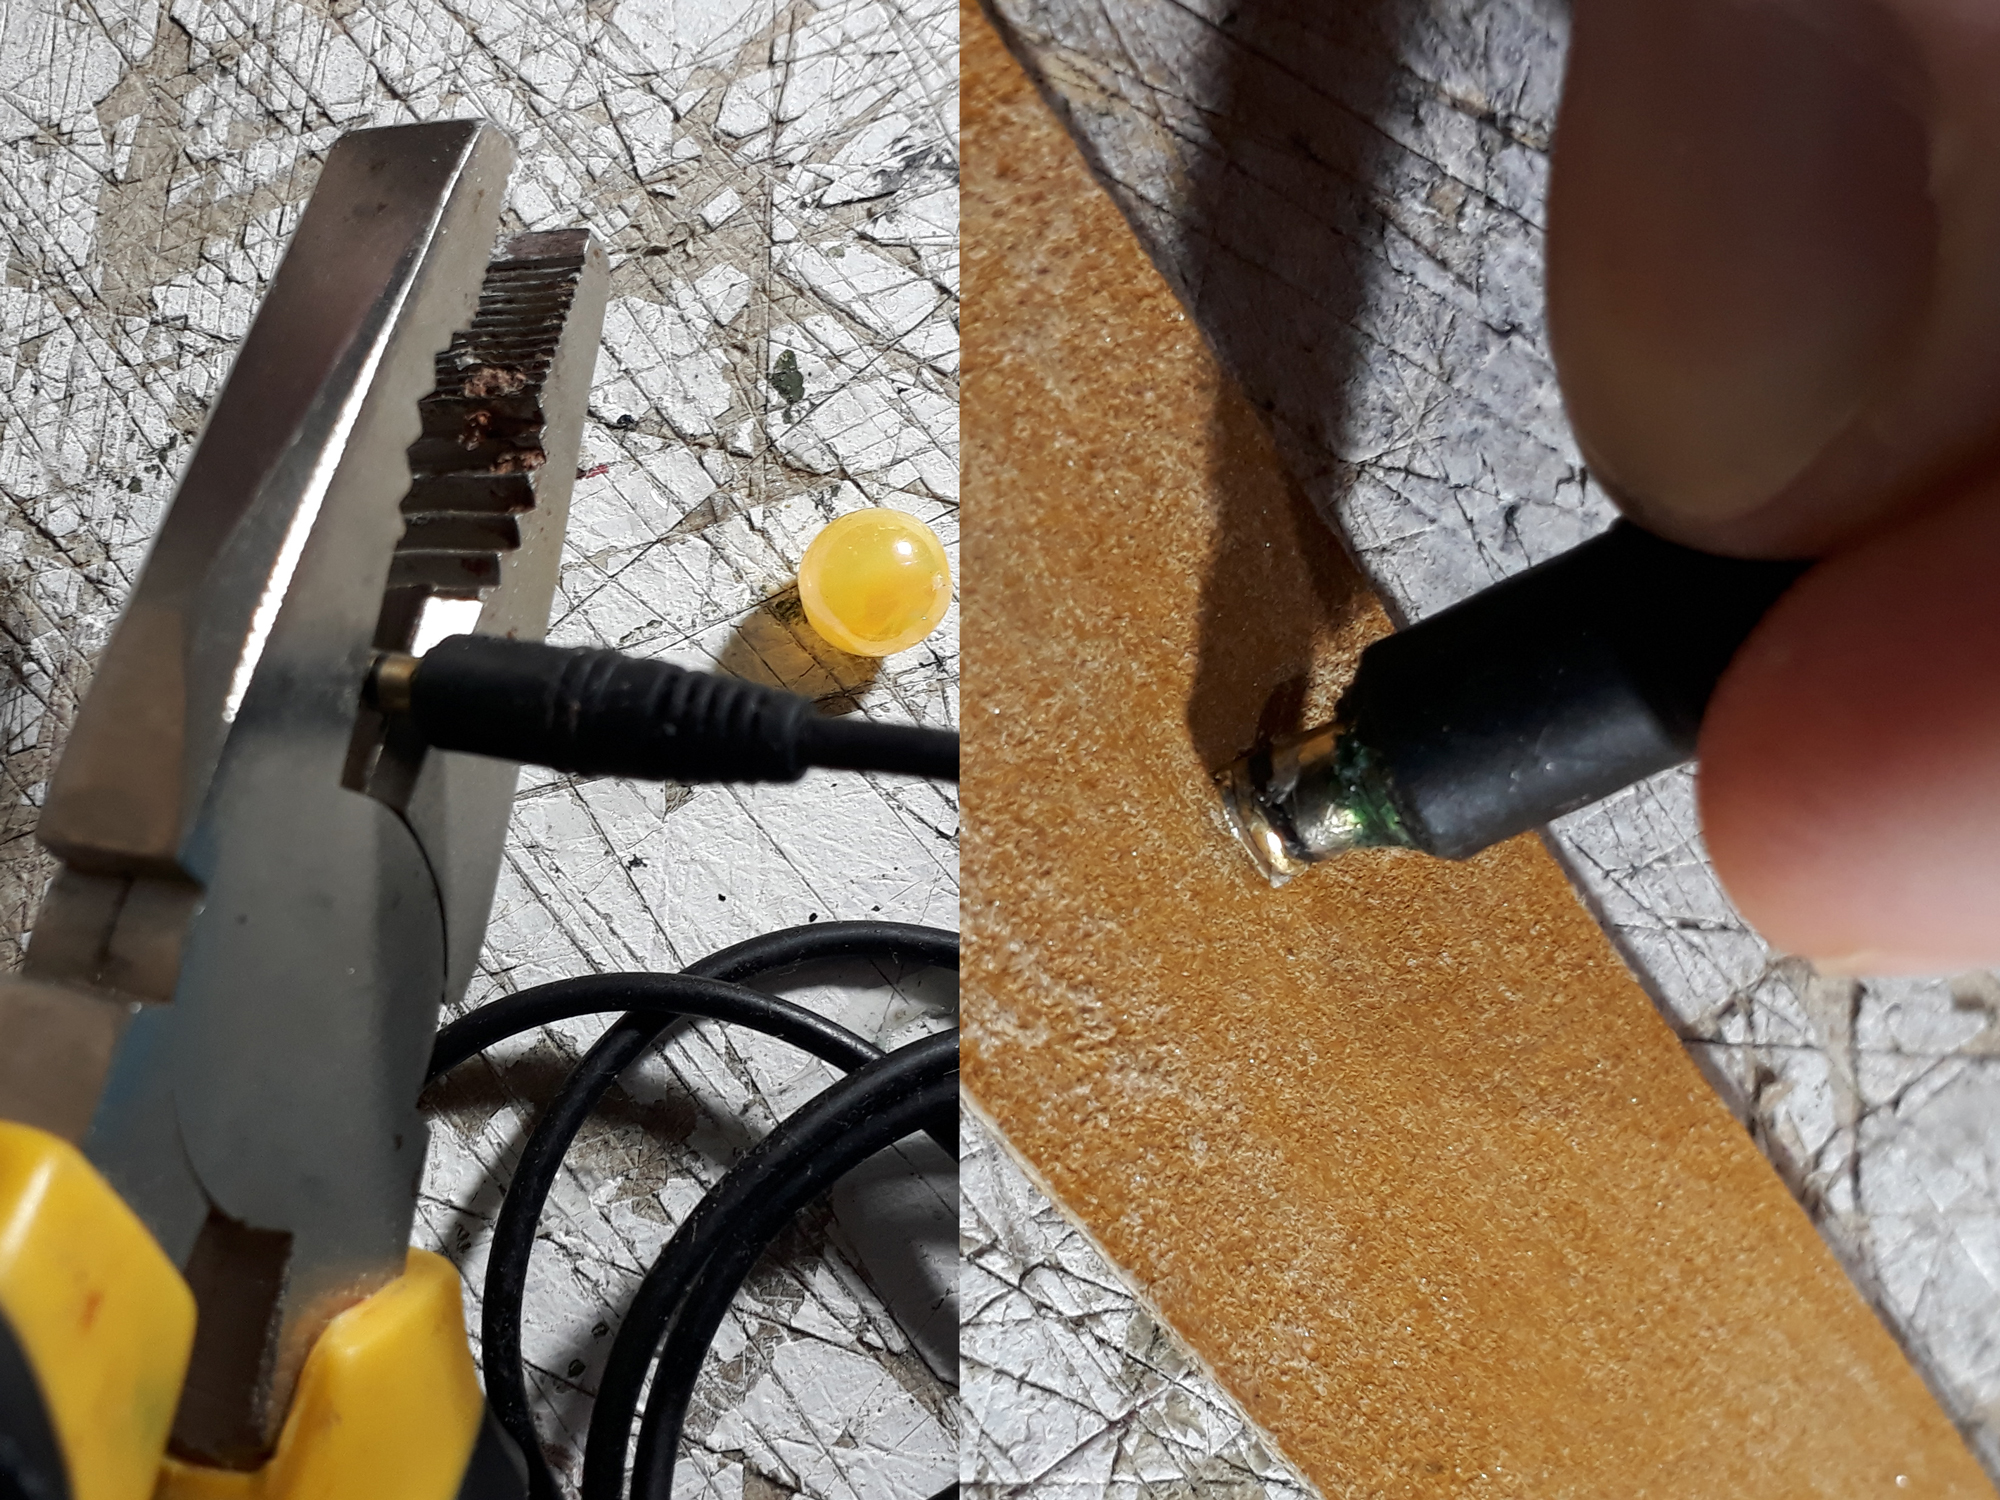
02 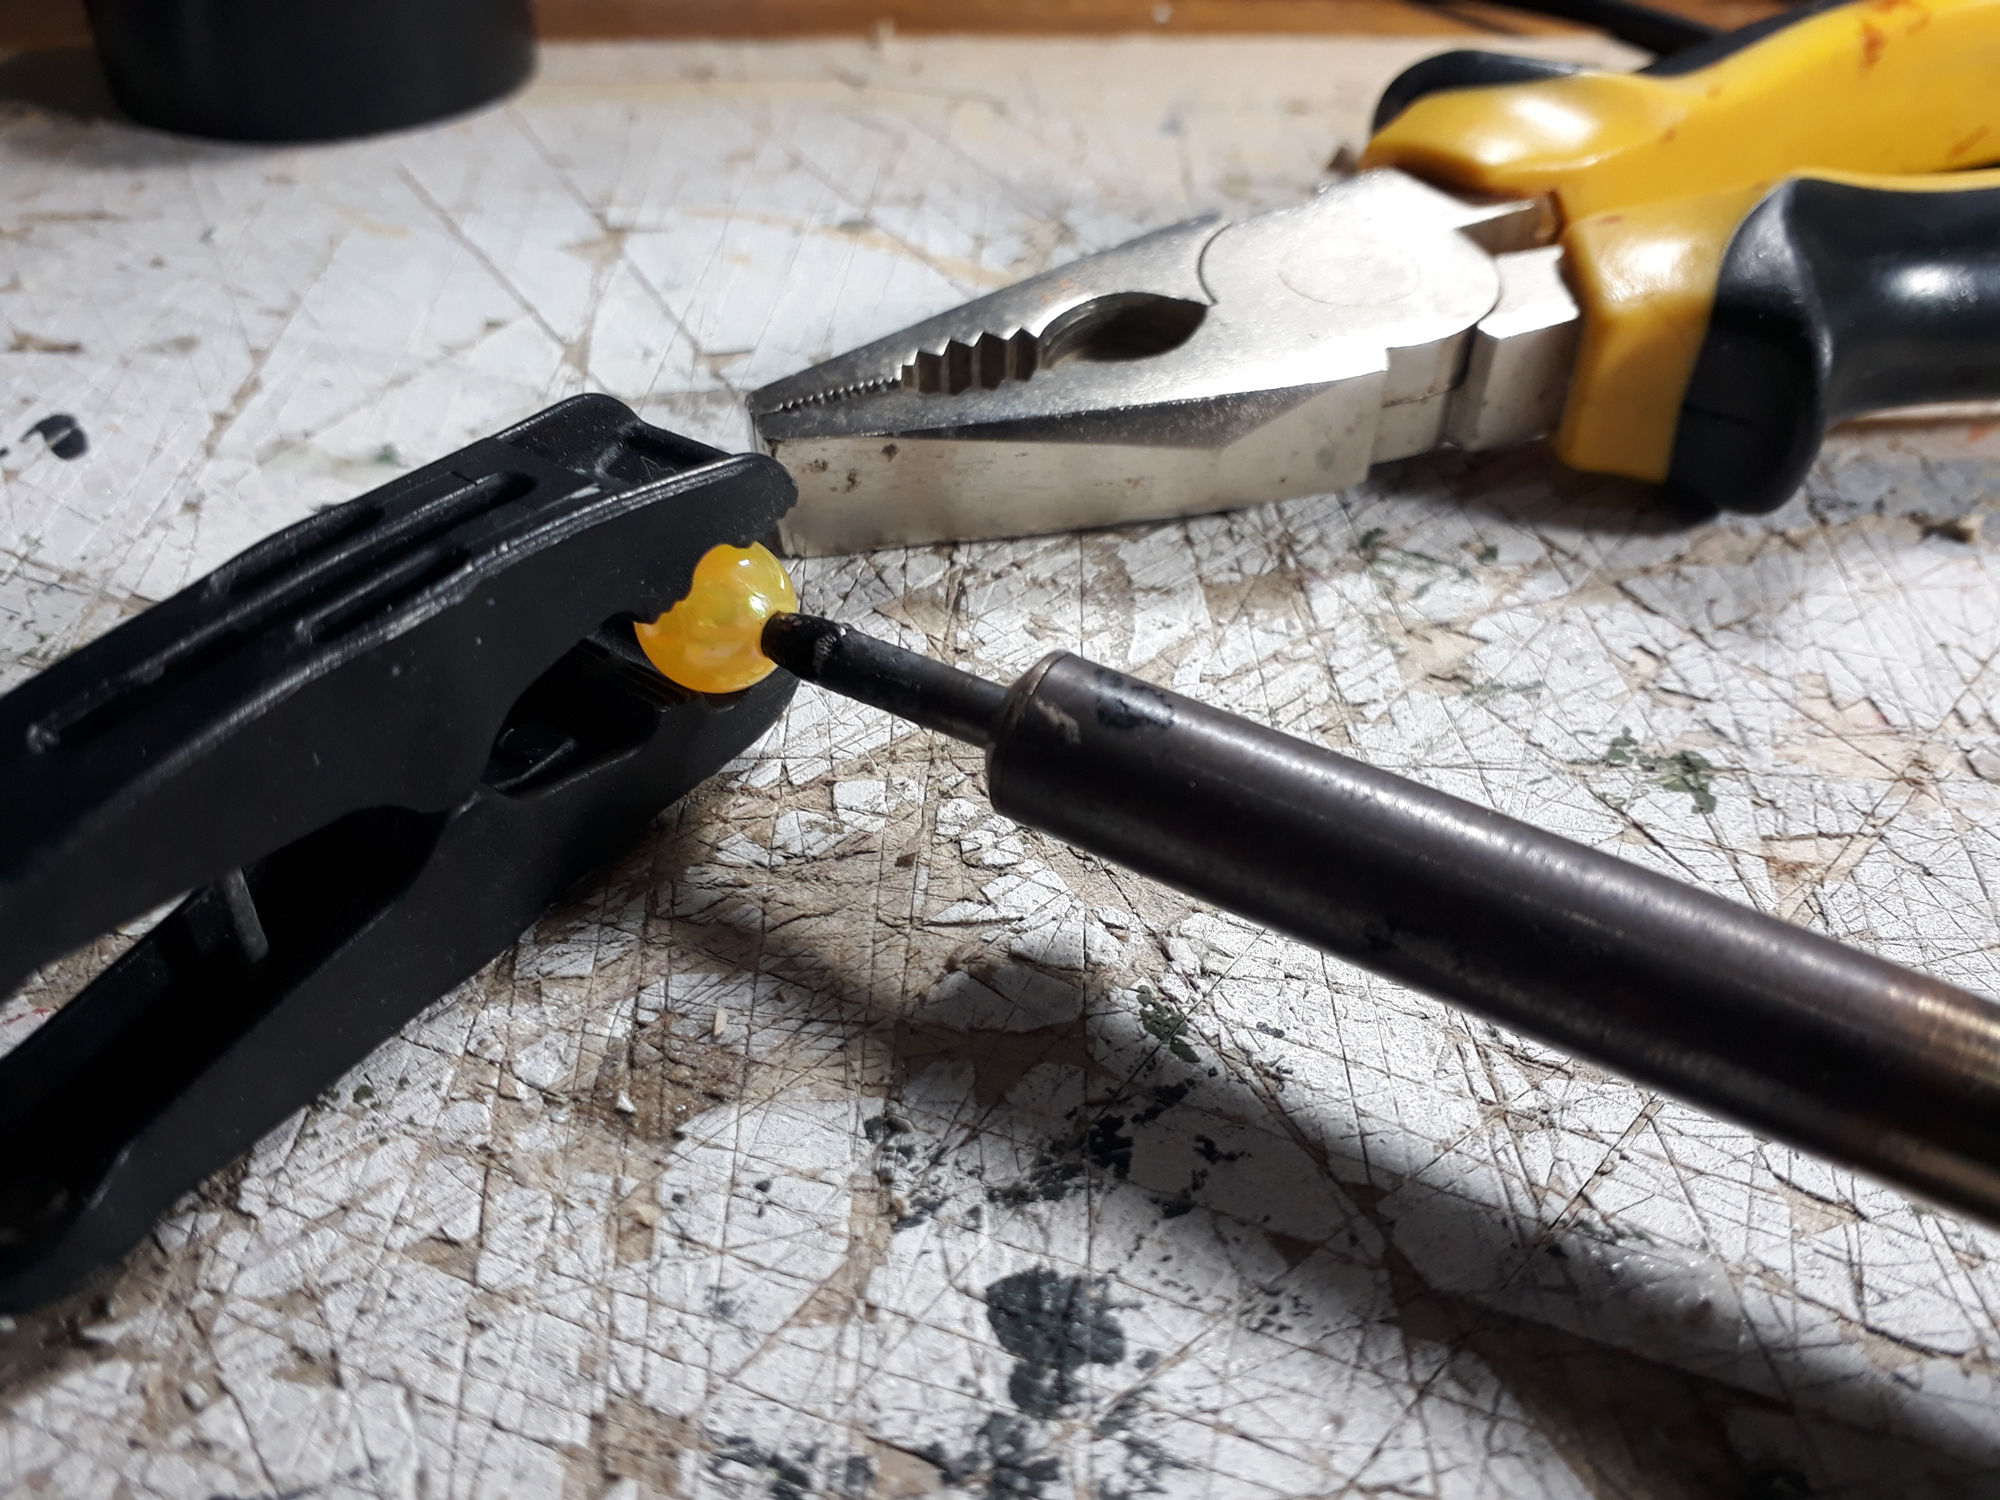
03 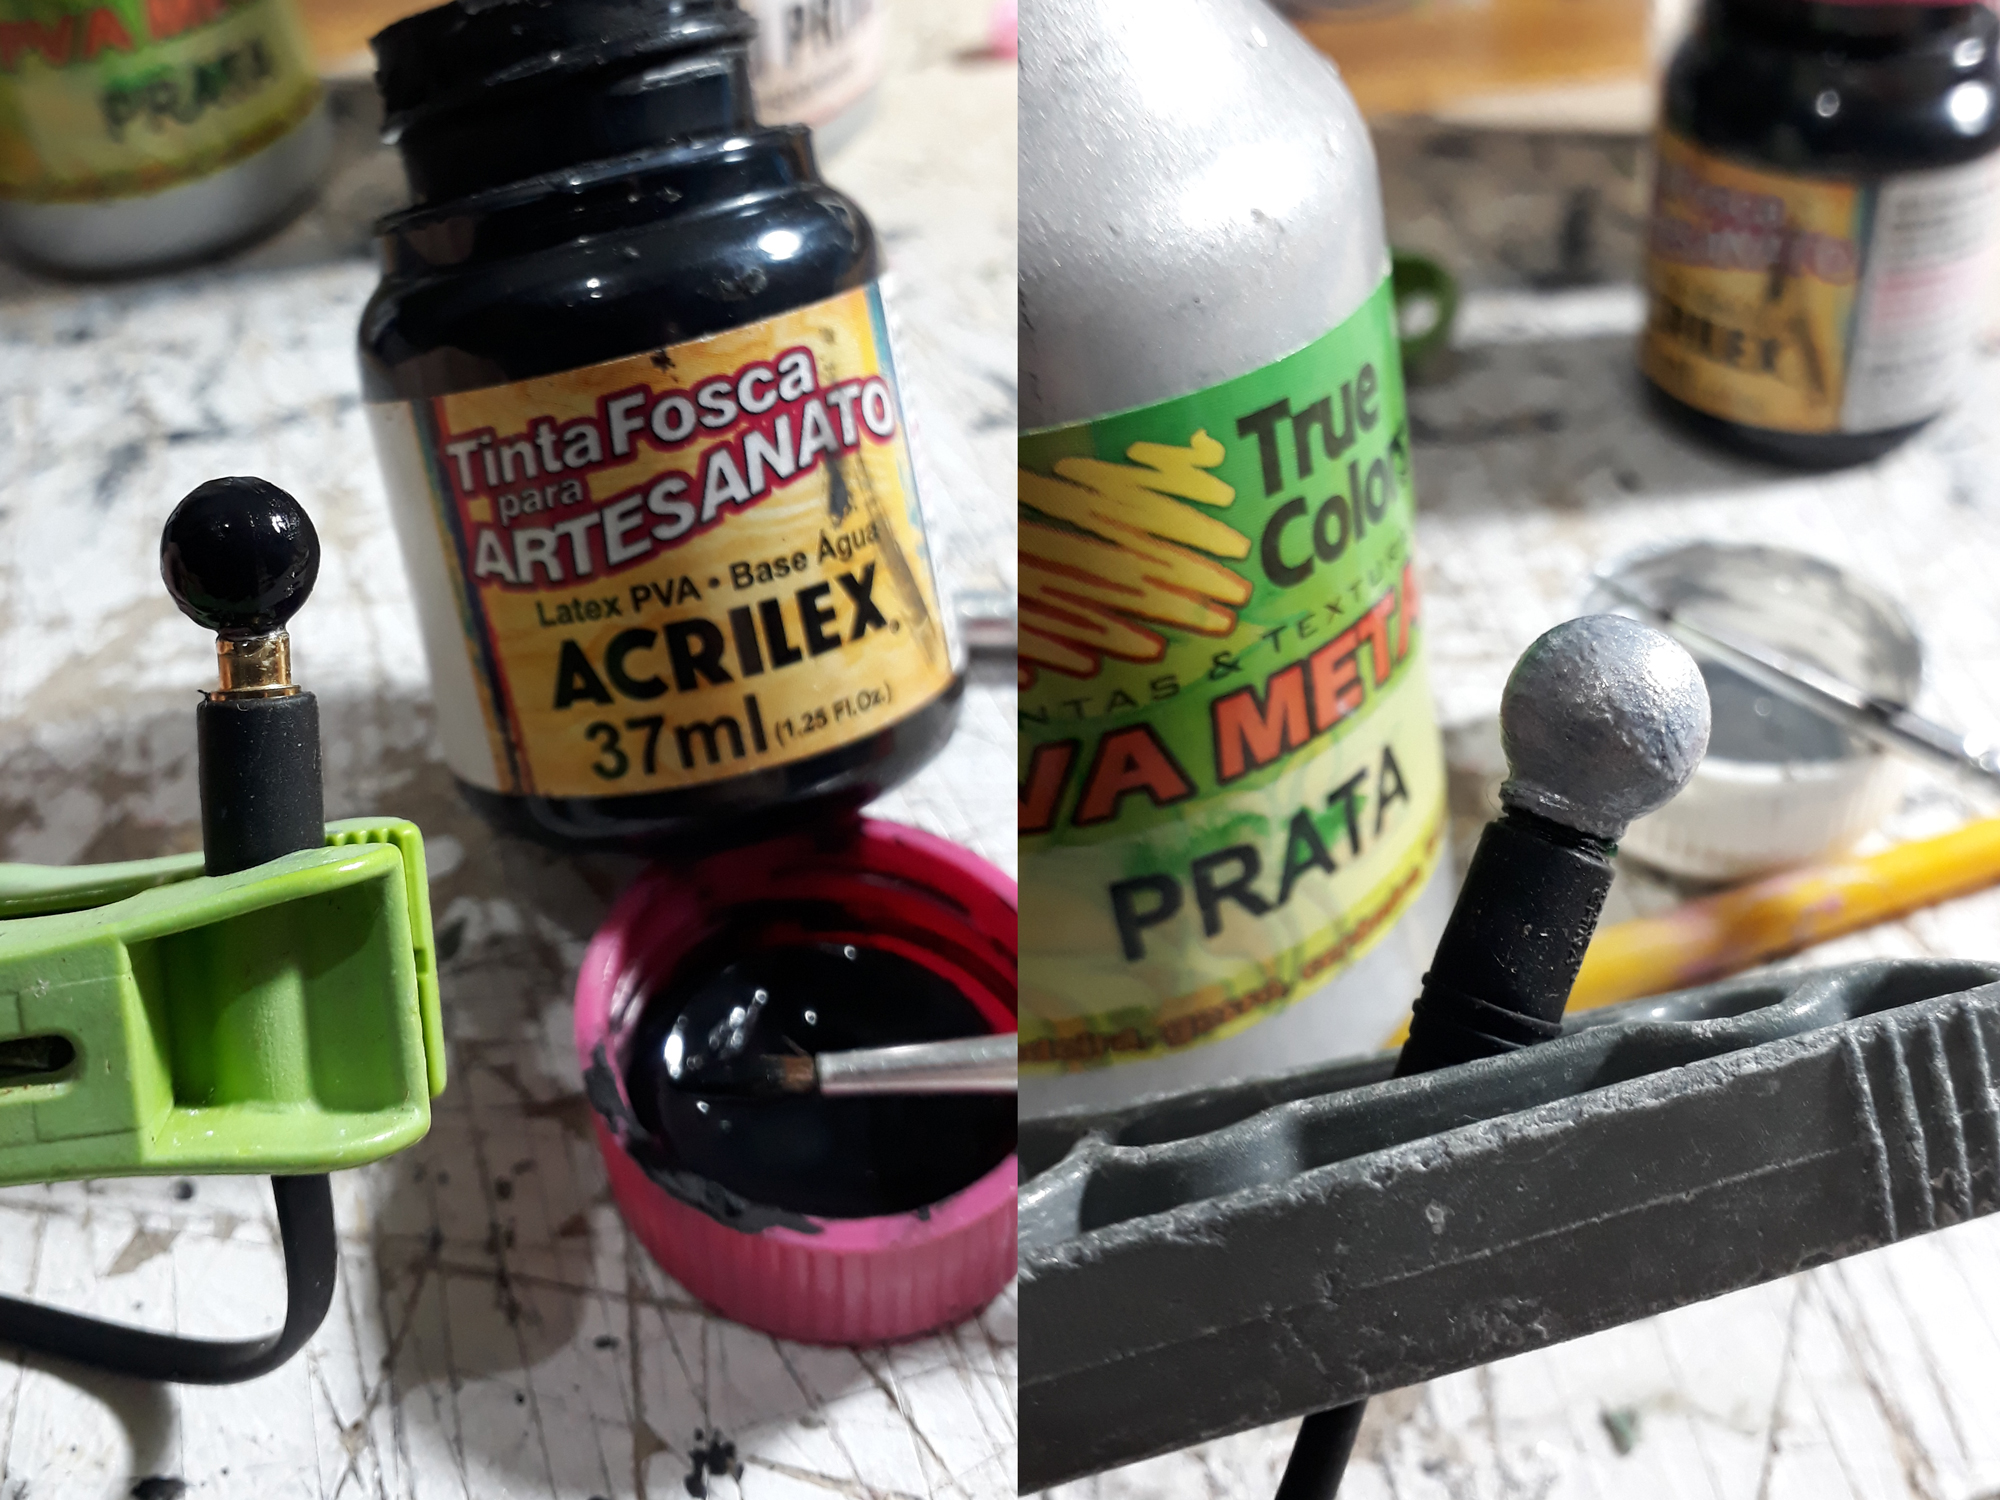
04 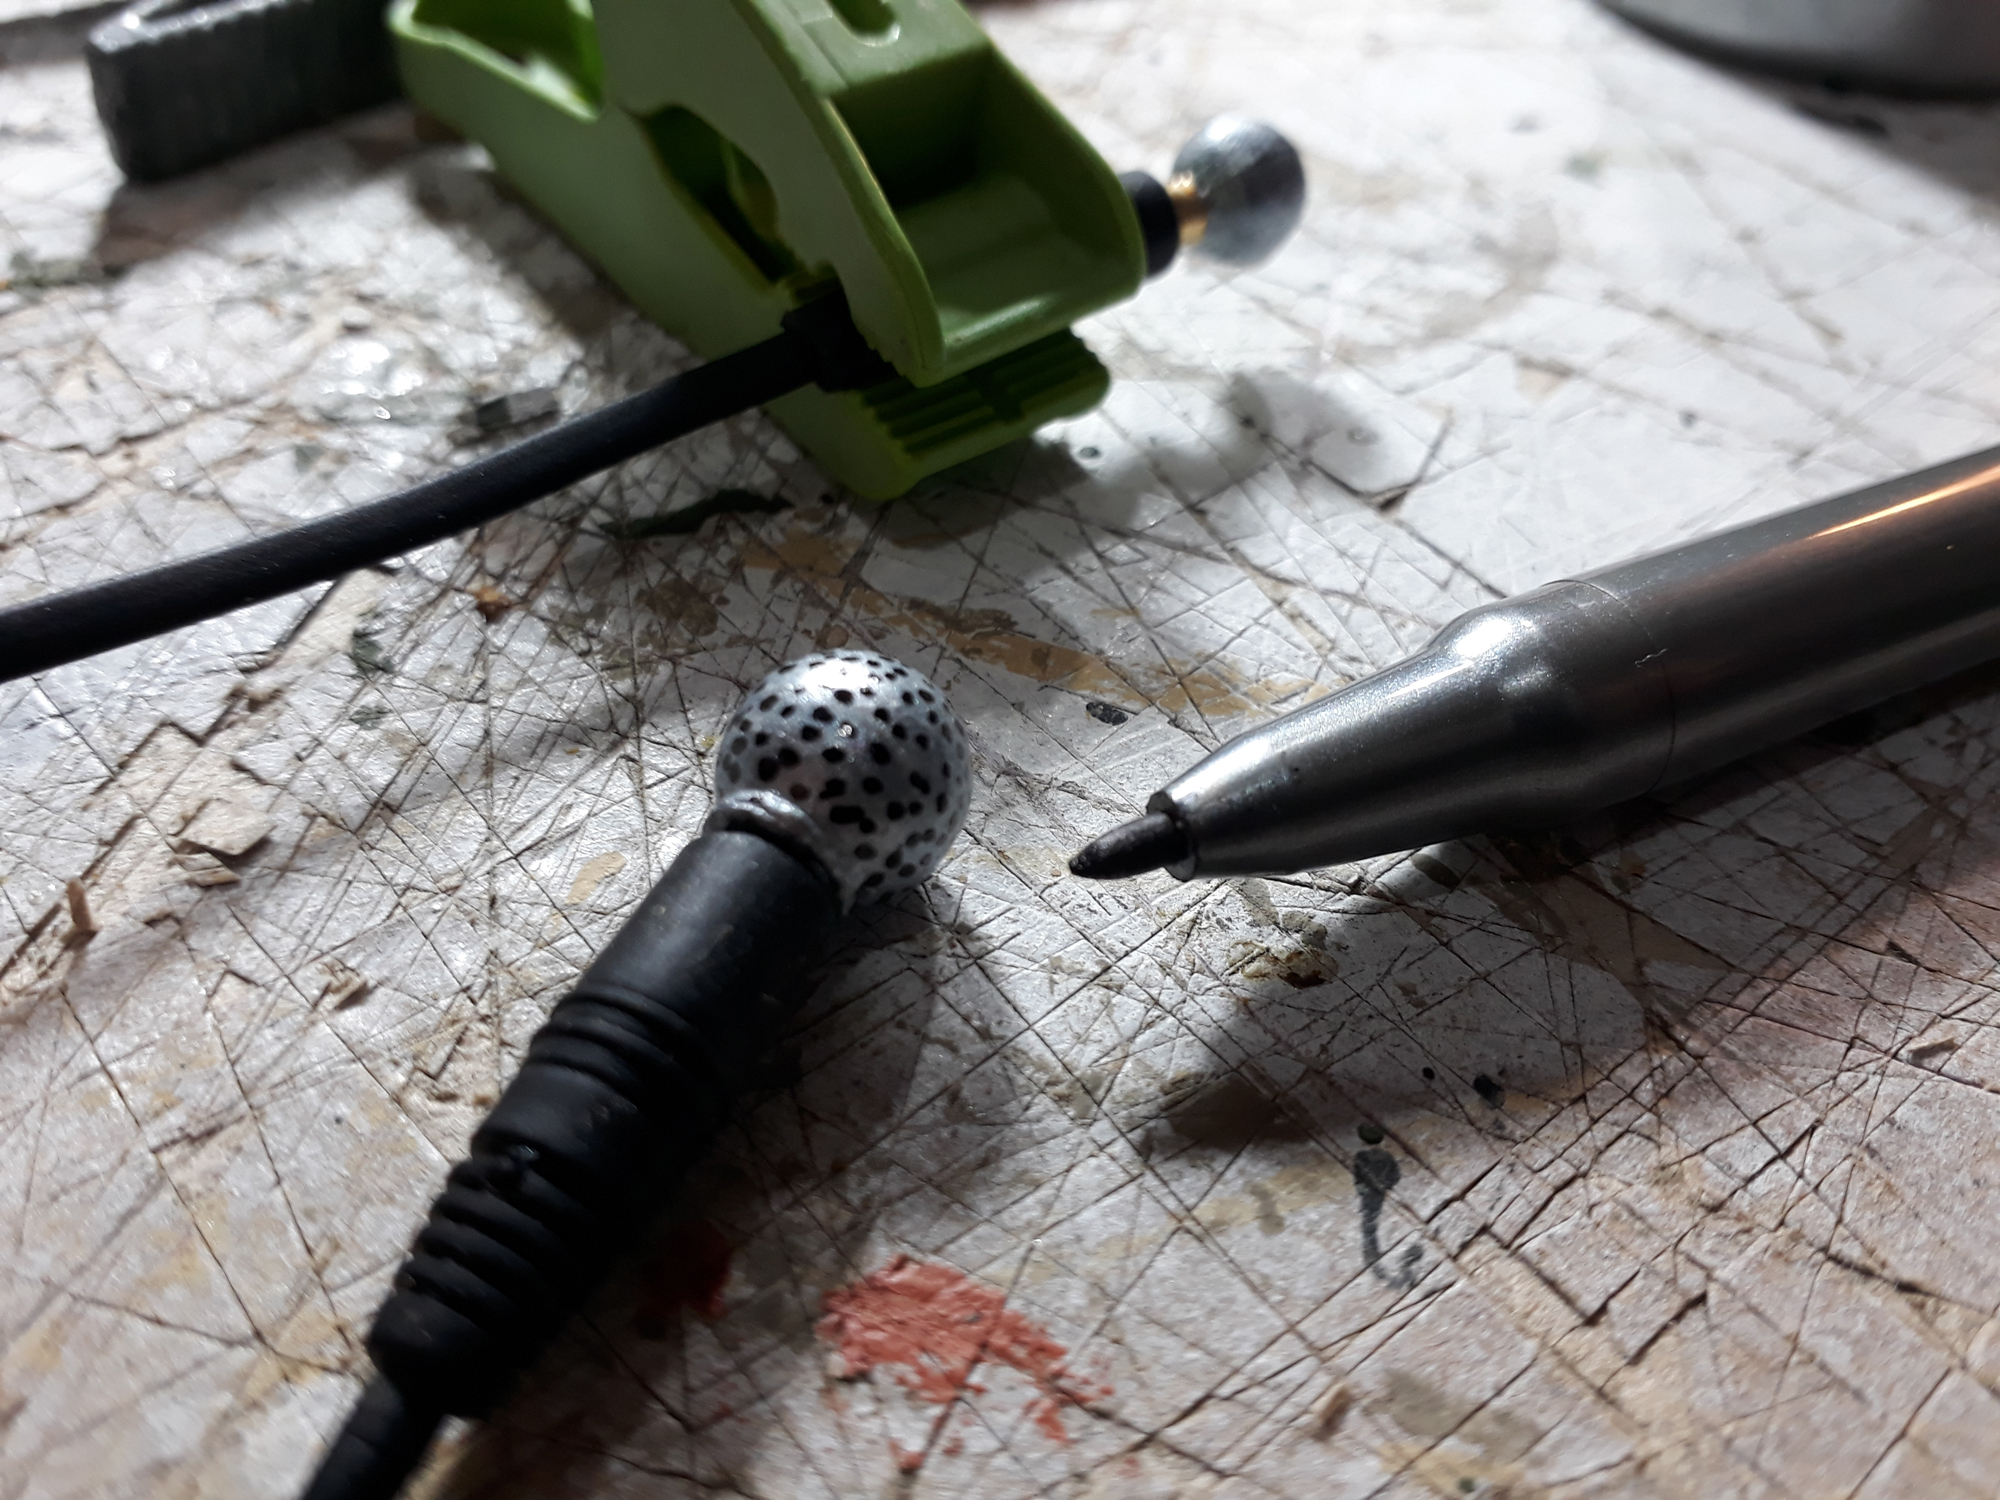
05
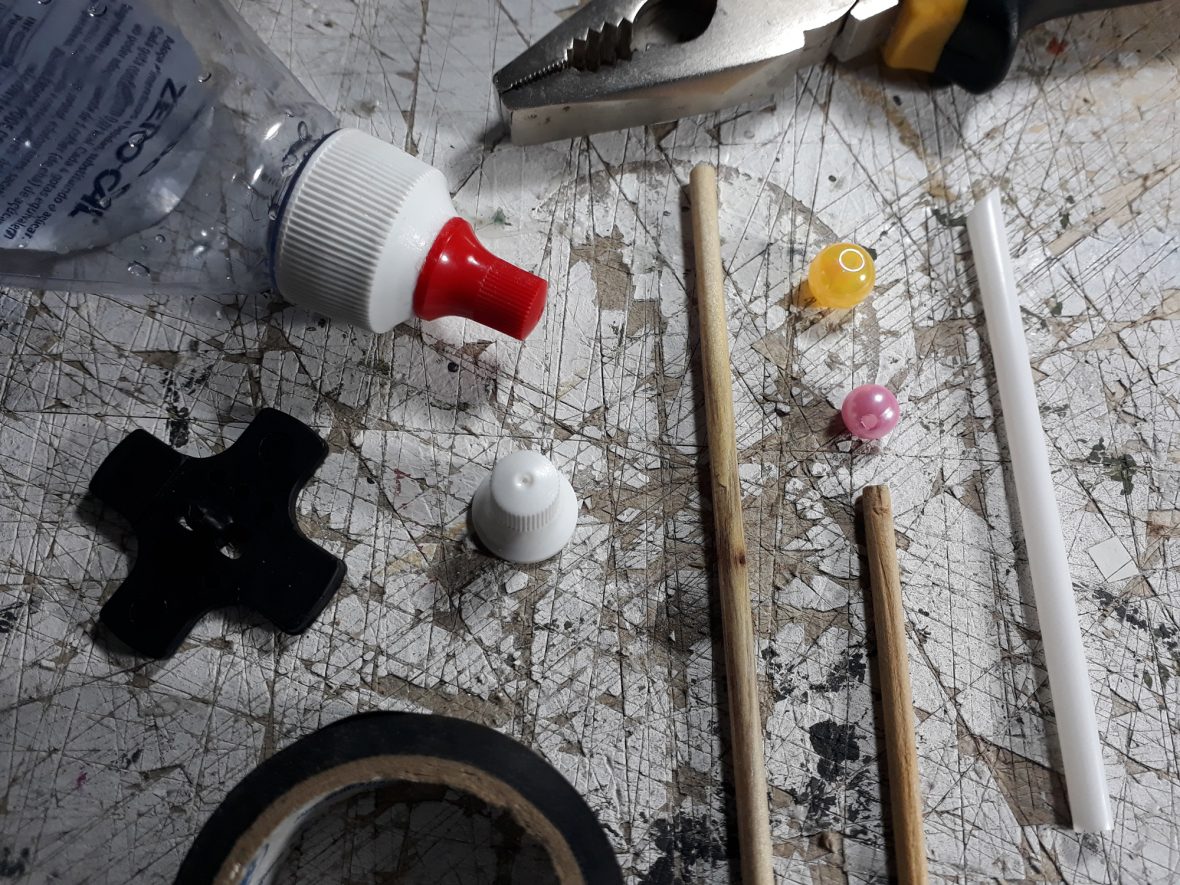
Para o Pedestal você vai precisar de:
- Uma base em Y ou X de plástico ou Cartão
- Palitos de madeira ou plástico
- Canudo de plástico (preto de preferência)
- Tampa de adoçante
- Primer para artesanato
- Tinta para artesanato Preta e Prata
- Fero de solda ou ponteira de ferro aquecida
- Fita isolante preta
- Alicate de corte
- Cola Quente
- Para a Base você pode recortar um cartão em formato de X ou Y. Eu usei duas peças que prendiam bonecas em suas caixas (reciclagem total). Elas jé eram pretas e em formato de cruz.
- Cole e tampa do adoçante no centro da base e com o ferro de solda quente faça um furo em cima para encaixar o palito pintado de prata.
- Agora faltam detalhes: Corte 3 tiras finas da fita isolante e faça acabamentos na base,, no meio e no topo do palito.
- Corte o canudo e abra um rasgo no seu comprimento. Vamos colar com cola quente no topo do palito.
- Passe uma dose de primer e depois pinte com tinta preta todas as partes necessárias.
Agora sim! Seu show vai fazer o maior sucesso!
DIY – PEDESTAL 01 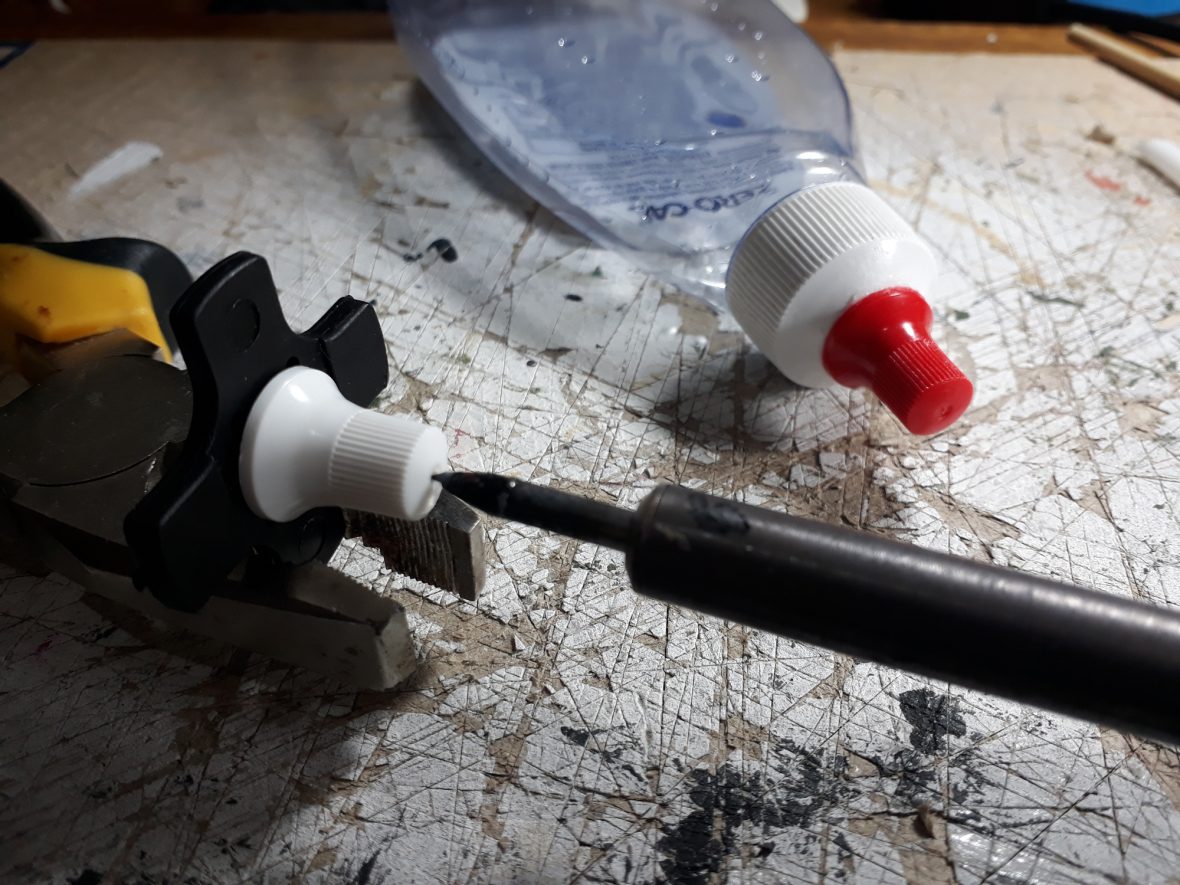
DIY – PEDESTAL 02 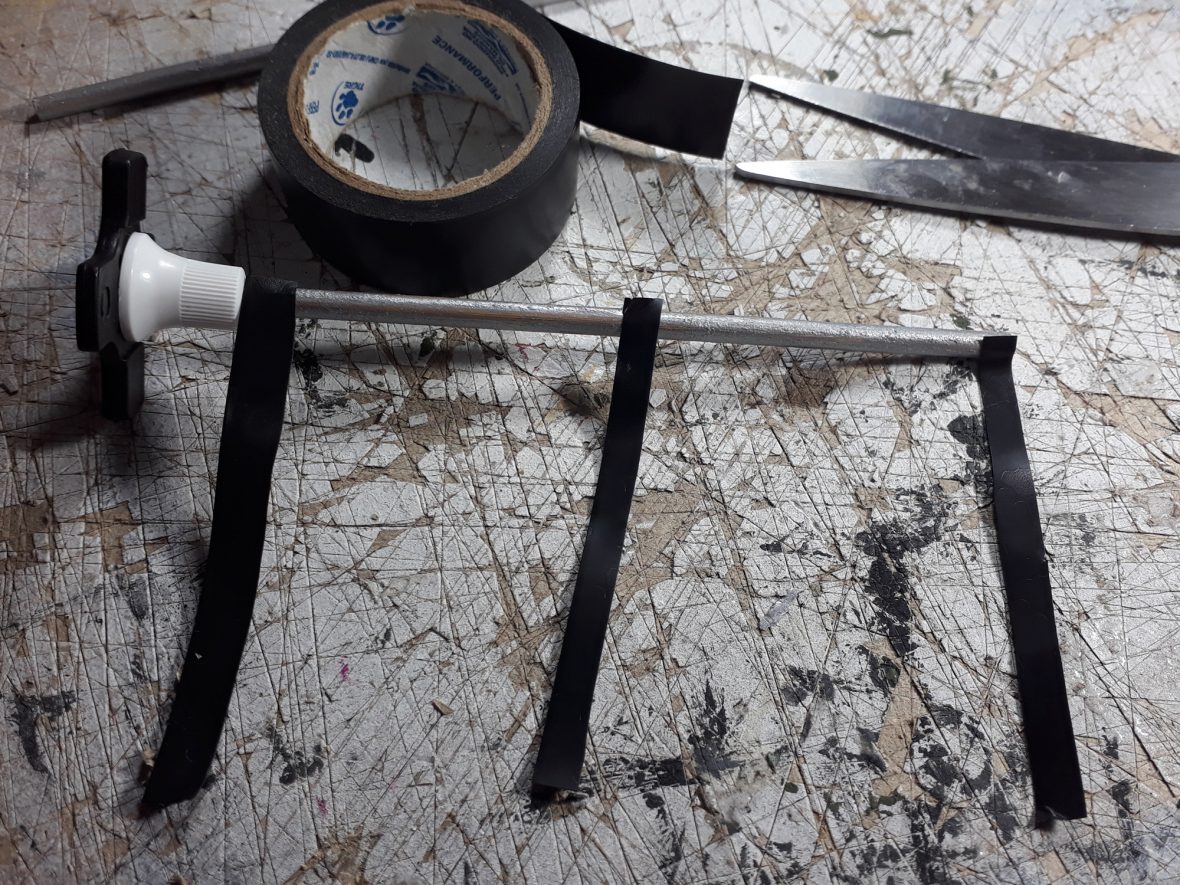
DIY – PEDESTAL DE MICROFONE 03 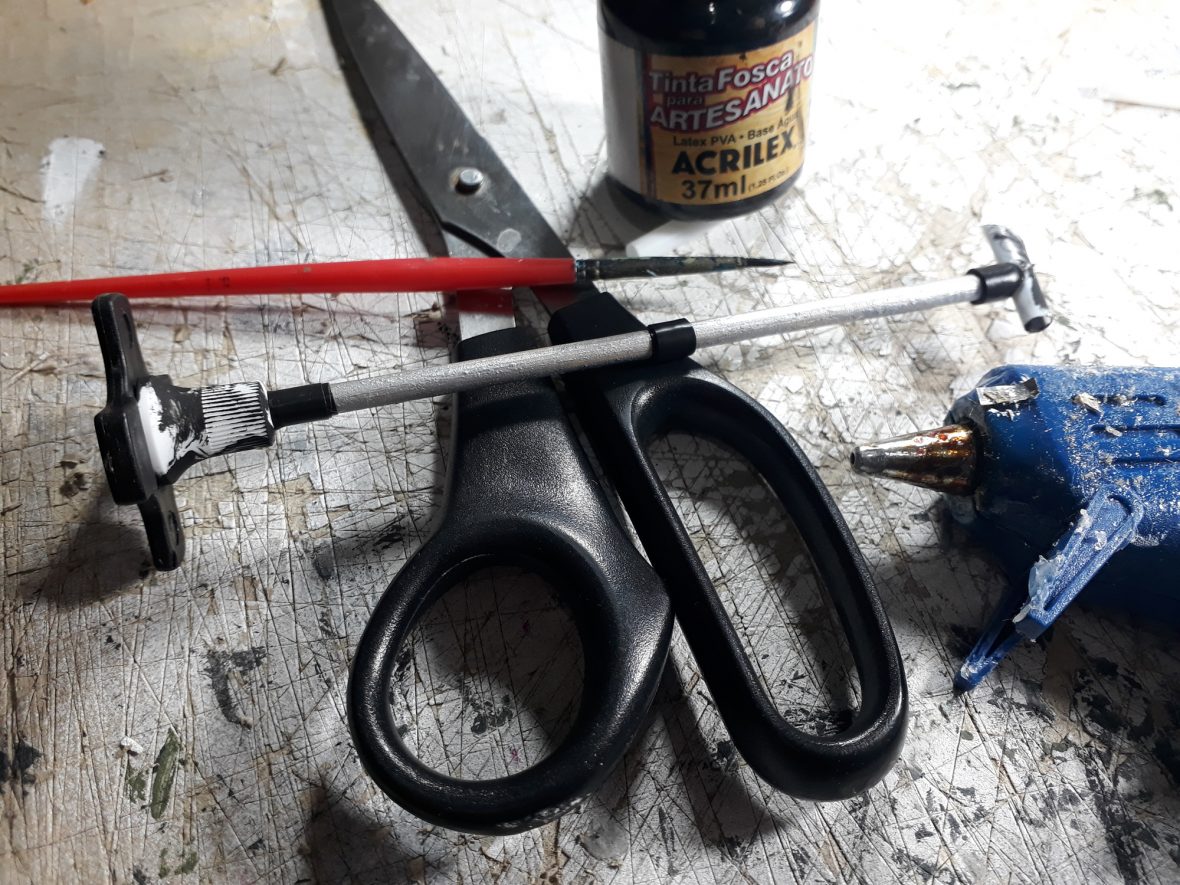
DIY – PEDESTAL DE MICROFONE
DIY: Microphone and Pedestal
In the last photo of Guguinha in honor of Cazuza, I decided to improve the equipment by producing a microphone and pedestal. Want to make your show more realistic? Follow the tutorial!
For the Microphone you will need:
- Beads for jewelry (silver preferred)
- Headphone plug
- Primer for crafts
- Black and Silver Craft Ink
- Fine tip marker pen
- Soldering iron or heated iron tip
- Cutting pliers
- Super glue
- Let’s start by cutting the tip of the headphone plug, leaving a small stump. Let’s sand the burrs to align.
- Take a plastic jewelry bead and we will widen the hole with a soldering iron or a heated tip on the fire to fit the plug’s stump.
- After placing the bead with super glue on the plug stub it is time to paint the bead. If you already have a silver color you don’t even need it. First, we make a primer base for the paint to set. Then a black base to make the color uniform and finally the silver ink.
- The Microphone is practically ready. To make the details of the “holes” we use the fine point marker pen to dot the microphone head.
For the Pedestal you will need:
- A Y or X base made of plastic or cardboard
- Wooden or plastic toothpicks
- Plastic straw (black preferred)
- Sweetener lid
- Primer for crafts
- Black and Silver Craft Ink
- Soldering iron or heated iron tip
- Black electrical tape
- Cutting pliers
- Hot glue
- For the Base you can cut out a card in the shape of X or Y. I used two pieces that attached dolls to their boxes (total recycling). They were already black and shaped like a cross.
- Glue and cover the sweetener in the center of the base and with the hot soldering iron make a hole on top to fit the silver painted toothpick.
- Now details are missing: Cut 3 thin strips of electrical tape and finish on the base, middle and top of the toothpick.
- Cut the straw and open a slot in its length. We will stick it with hot glue on the top of the toothpick.
- Apply a dose of primer and then paint all necessary parts with black paint.
Now yes! Your show will be a huge hit!
Facebook: www.facebook.com/turmadoguguinha/
Instagram: www.instagram.com/turmadoguguinha/
Website: www.turmadoguguinha.com.br
Microphone #pedestal #rock #diorama #dioramacreators #toypics #toypic #toyphoto #toyphotography #topToyPhotos #epictoyart #toyunion #toygroup_alliance #fca #ACBA #cafainsta #cafadolls #headcafa #bzdc_br #toypic_community #toypiccommunity #toygroupbrasil #esferatoy #turmadoguguinha
0